
Reolink Argus Eco is a battery-powered camera that supports siren, two-way audio, cloud storage, and time-lapse, etc.
Siren
The camera with an audio alarm or siren can make a long and loud sound as a signal or warning when it detects motion.
-
On Reolink App
-
Connect to the camera, enter Device Settings, and go to Siren (under Notification Settings).

-
Toggle the switch to enable Siren. You can go to Siren Sound to customize alarm sounds.

For more details, refer to:
1. How to Set up Sound Alarm (Siren) via Reolink App;
2. How to Set up Siren Alarm via the Reolink App (Video);
3. How to Set up Audio Alarm(Siren) Schedule via Reolink App.
-
Connect to the camera, enter Device Settings, and go to Siren (under Notification Settings).
-
On Reolink Client
-
-
Connect to the camera and go to Device Settings > Surveillance > Siren.
-
Toggle the switch to enable Siren.

For more details, refer to:
1. How to Manually Trigger Siren via Reolink Client (New Client);
2. How to Set up Audio Alarm (Siren) Schedule via a Web Browser.
-
Connect to the camera and go to Device Settings > Surveillance > Siren.
-
Two-Way Audio
Two-way audio allows you to receive and transmit audio through the camera. Reolink cameras that support two-way audio have a built-in speaker and microphone. You can talk through the camera via your Reolink App/Client when you are far away from home.
-
On Reolink App
- Log in to your camera and enable Record Audio on the Device Settings page.
- Return to the camera live view interface. Tap the loudspeaker
 icon to turn on the audio and tap the Talk
  button to enter the two-way audio interface.
 -
Tap the microphone
 button to talk and tap the button again to turn it off.
To exit the two-way audio interface, tap the cross
 icon.
icon.For more details, refer to:
-
On Reolink Client
-
- Log in to the camera and go to Device Settings > Camera > Audio and Light to enable Record Audio.
-
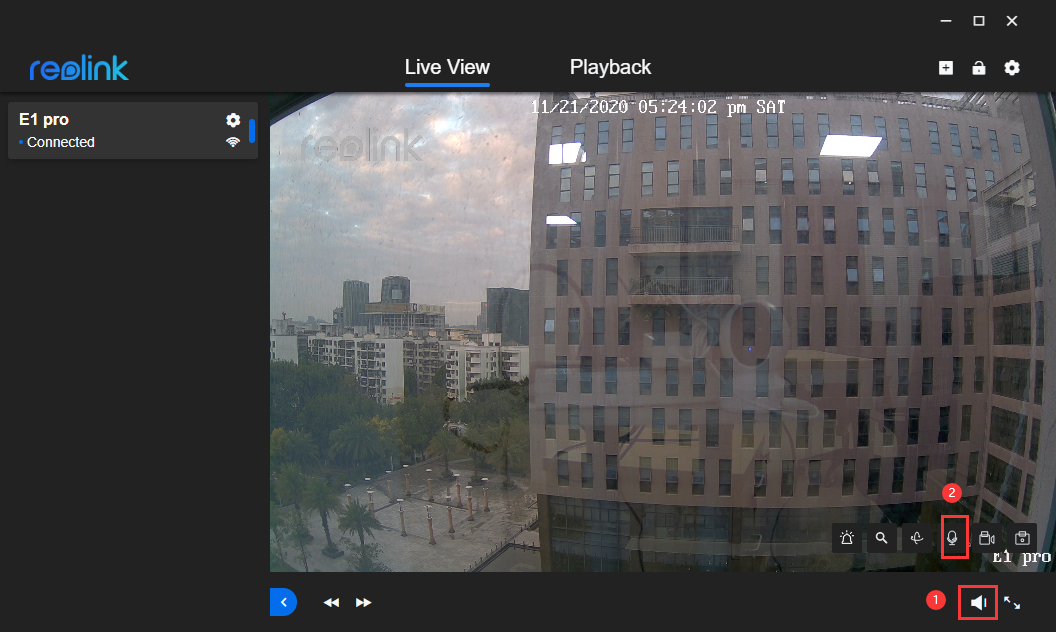
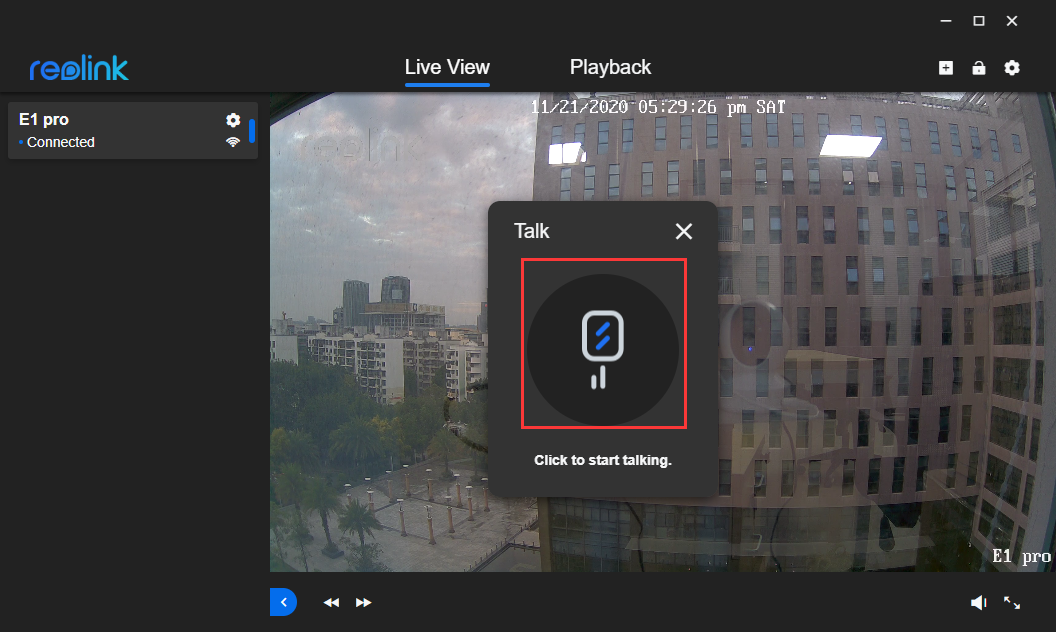
Enable audio (click the loudspeaker icon at the bottom right corner of the Live View interface) and click the microphone icon at the bottom of the live view. Click the microphone to start talking. The two-way audio function is enabled and you can talk now. To turn the microphone off, click the microphone again.
For more details, refer to:
-
Cloud Storage
Different from local storage, Reolink Cloud service is based on cloud computing technology. It can perform data storage, editing, and retrieval over the Internet. Reolink Cloud service is not compulsory but optional.
The instructions below show you how to subscribe to a Cloud plan via Reolink App or the Reolink Cloud website.
-
On Reolink App
- Launch Reolink App on your phone, log in to the camera and your Cloud account.
- Go to the Cloud page, tap the Subscribe button.
- Choose a plan, read and confirm Terms & Policies, and proceed to checkout.
-
Select the camera(s) and tap the Bind button to bind it.
For more details, please refer to:
Which Models/Countries or Regions Support the Cloud Service?
How to Bind Reolink Cameras to the Existing Cloud Account
How to Create a Cloud Account and Bind Cameras to the Cloud Plan via Reolink App
-
On Reolink Cloud Website
-
-
Sign up and create your Reolink Cloud account. Please make sure that you have verified your email address.
-
Choose a Cloud plan and fill in the billing address.
-
Bind your cameras to the Cloud via Reolink App.
For more details, please refer to:
How to Subscribe to Reolink Cloud Plans via the Reolink Website
How to Bind Reolink Cameras to the Existing Cloud Account
-
-
Time-Lapse
Time-lapse photography, also known as time-lapse video, is a shooting technique that compresses time. It shoots a group of photos or videos. Later, by connecting photo series or extracting video frames, the process of several minutes, hours, or even several years is compressed into a short period of time and played as a video.
The below instructions show you how to set up time-lapse via Reolink App or Reolink Client.
-
On Reolink App
-
Launch Reolink App and go to Device Settings > Time-Lapse.
-
Tap Try Now and select a scene for time-lapse capture.


-
Customize settings for the scene you choose.
-

For more details, please refer to:
-
How to Set up the Time Lapse Feature and Playback the Time Lapse Video via Reolink App (Video)
-
-
On Reolink Client
-
Launch the Reolink client, log in to the camera, and click the Time-Lapse button.
-
Click Create Now and select a scene for time-lapse capture.

-
Customize settings for the scene you choose.

For more details, please refer to How to Set up Time Lapse via Reolink Client
-