There are 3 methods to add Reolink cameras to Blue Iris.
Applies to: All Reolink IP cameras and POE NVRs ( Reolink E1 Pro& E1 Zoom are included) except for all Reolink battery-powered cameras, Reolink E1, B400, D400, B800, D800, and Reolink Lumus)
Note: Accessing through 3-party software is currently not available for Reolink battery-powered cameras to save battery life.
Here is a video for your reference:
Before adding the camera to Blue Iris, make sure that the camera ports are all enabled via Reolink Client or web browser.
Method 1: Add the camera via ONVIF Protocol Manually
Step 1. Launch Blue Iris, right-click to choose Add New Camera, and click OK to add a camera in LAN
Step 2. Confirm Onvif protocol is selected by default for Make Setting. Enter the camera IP address and password, and make sure the RTSP and ONVIF port numbers are the same as your camera’s, click OK. You can live view the camera on Blue Iris now.
Method 2: Add the camera via Reolink protocol
Step 1: Launch Blue Iris, right-click to choose Add New Camera, and click OK to add a camera in LAN
Step 2: Choose Reolink as a protocol for the Make setting. Enter the camera IP address and password. Make sure the RTSP and ONVIF port numbers are the same as your camera’s. Type your camera’s username (admin by default) and password in the URL, click OK. You can live view the camera on Blue Iris now.
Note: when you use Reolink protocol to add a camera, please pay attention to the following points.
a. Cameras with a resolution of 8MP and above can only use the sub-stream to live view, because when you use the Reolink protocol to add a camera, you actually use the RTMP protocol, while RTMP does not support the h.265.
b. If you can’t find the corresponding model for Model settings, just use the first default *model, no modification is required, and the model is not required to be correct.
c. When adding cameras on different channels from the NVR, the steps are the same as adding a single camera, just repeat the same steps to add with the same IP (the IP address of the NVR) address, and only need to pay attention to modifying the channel field of the URL. The channel starting from 0 in the URL is counted as the first channel on the NVR. For example, if you add a camera with channel 2, then the channel number should be changed to 1 in the URL.
Method 3: Scan the camera in LAN via ONVIF Protocol
Step 1: Launch Blue Iris, right-click to choose Add New Camera, and click OK to add a camera in LAN
Step 2: Click Find/inspect to search the camera, select the camera and click OK.
Step 3: After searching is done, click Close.
Step 4: Enter the camera's password, click OK. You can live view the camera on Blue Iris now.
- The default ONVIF port for the Reolink products is 8000. Here is an instruction for you to learn how to enable ONVIF/RTSP ports and set their values for your camera on Reolink Client: How to Set up Reolink Ports Settings via Reolink Client (New Client).
- Please make sure that the corresponding ports are enabled for the camera if your model is AI-type.
- If you cannot connect the camera successfully by choosing the camera model in the model list on Blue Iris, please select H.264 RTSP to have a try.

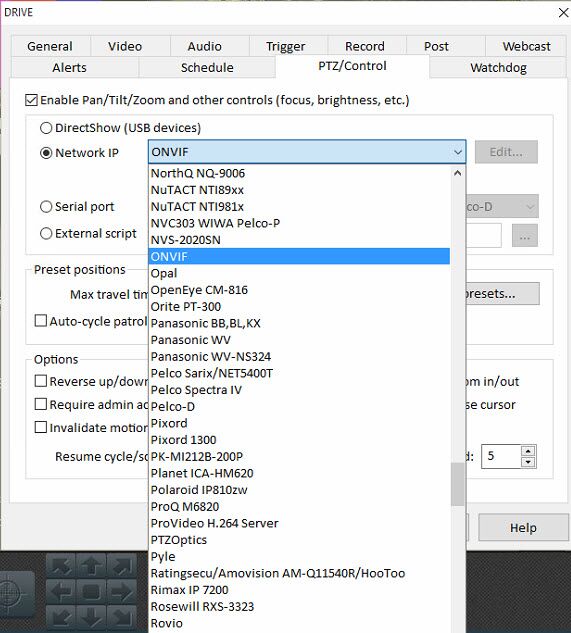
- For the PTZ camera, please go to PTZ/Control tab, check Enable Pan/Tilt/Zoom and other controls (focus, brightness, etc.), to use the PTZ feature.

